

Wie kaufe ich IOTA im Jahr 2022? – Eine Schritt-für-Schritt-Anleitung
By Kaela R. 8 min read
Wo kaufen IOTA
Unten sind die beliebten Kryptobörsen basierend auf Benutzererfahrung, Sicherheit, Gebührenstruktur und unterstützter Münze aufgeführt, die Sie zum Kauf von IOTA (MIOTA) im Jahr 2022 verwenden können.
Bevor ich fortfahre, möchte ich klarstellen, dass die Rangfolge dieser Börsen keine bestimmte Reihenfolge hat. In diesem Sinne - Lassen Sie uns diese Kryptoplattformen nacheinander erkunden, damit Sie die beste Kryptowährungsbörse für den Kauf Ihrer IOTA auswählen können.
1. Binance
Binance gets a lot of things right for traders who wish to focus solely on cryptocurrency. A diverse range of popular cryptocurrencies should appeal to everyone save the most passionate crypto fans.
Low trading costs and volume reductions should entice more active traders, especially because fees elsewhere are far higher.
Newer investors who want customer service may find a better match elsewhere, particularly if they intend to trade other stocks or crypto as a sideline.
Based on what has been discussed so far, Binance is unquestionably the premier Cryptocurrency Exchange, with low costs and excellent digital currency support.
Binance Funktionen
- Binance trading has some of the lowest costs in the business.
- On Binance, you can trade over 180 cryptocurrencies.
- The exchange is available through online and mobile apps for Android and iOS, as well as desktop programmes for macOS and Windows.
- Binance Futures provides up to 125x leverage while margin trading provides up to 3x leverage.
- It offers a dedicated help Centre where you may contact the support team or get actual beginning tips and explanations of various exchange operations.
- It also allows you to make passive income from your crypto assets through staking, crypto lending, and other methods.
So kaufen Sie IOTA auf Binance
Binance has a rich collection of tools and dashboards that might be overwhelming. Its Buy Crypto page makes it easy to cut through the confusion and conduct straightforward transactions. It has a simple interface where you can buy, sell, or convert cryptocurrency.
1. Login to your Binance account and on the homepage click on the “Buy Crypto “Button.
2. You can purchase IOTA (MIOTA) using a variety of fiat currencies. Enter the amount of fiat money you wish to spend, and the system will calculate the amount of IOTA you can acquire.
3. Select the payment method and fill the required information than Continue.
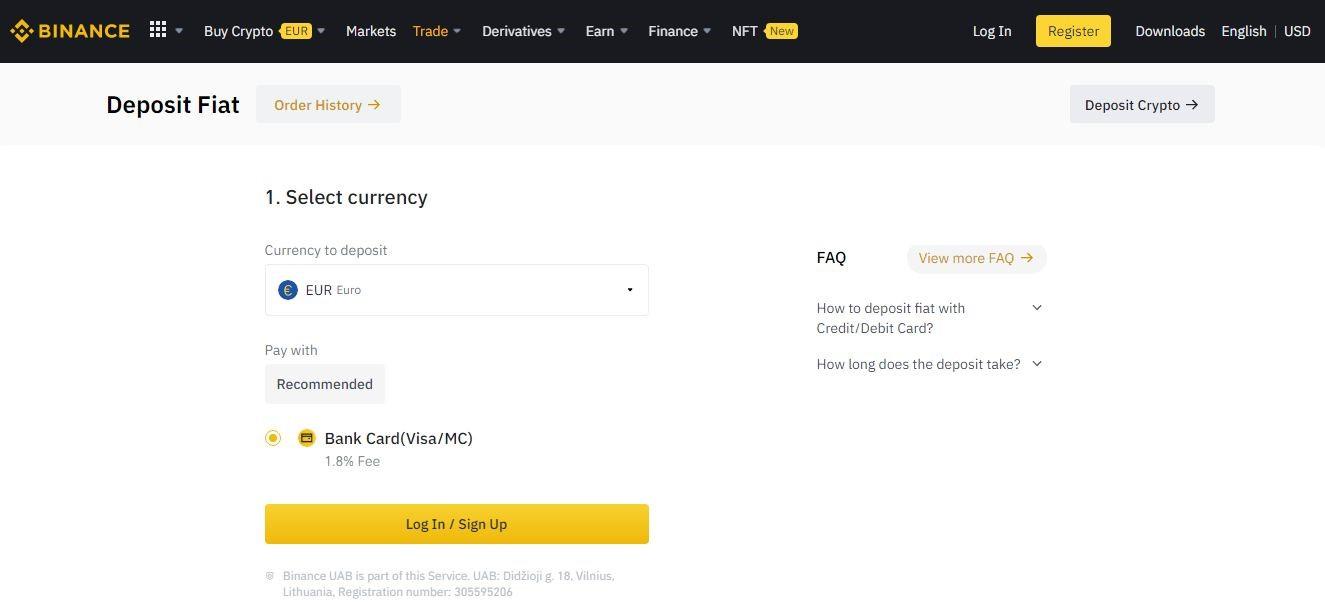
4. Please double-check the payment information and costs, and complete your purchase within 1 minute, otherwise the amount of IOTA you may get will be adjusted depending on the current market price.
5. You'll be taken to your bank's OTP Transaction Page. To validate the payment, follow the on-screen instructions. Following that, you will be able to see the acquired MIOTA in your Binance Spot Wallet immediately.
2. Binance
Binance is well-known for its cryptocurrency-to-cryptocurrency trading services. Binance came onto the scene during the 2017 crypto craze and has since risen to become the world's leading cryptocurrency exchange.
By trading volume, Binance is the world's largest online cryptocurrency exchange. The exchange is also one of the most rapidly growing venues in the cryptocurrency market today. You can easily buy and sell IOTA (MIOTA) using our step by step guide.
The exchange offers investors one of the most diverse selections of cryptos accessible on the market today. The currencies and tokens on sale range from the markets largest by market cap to some smaller and less well-known coins and tokens.
Erste Schritte mit Binance
Users must first create an account in order to utilize the exchange. The procedure is quite quick and straightforward, and you do not need to verify your account for level 1, which has a daily withdrawal limit of 2BTC.
For level 2, which enables up to 100BTC every day, you must upload a picture ID and wait for approval. There are still greater restrictions, but you must contact them personally to arrange for them.
Follow the steps below to open a Binance account:
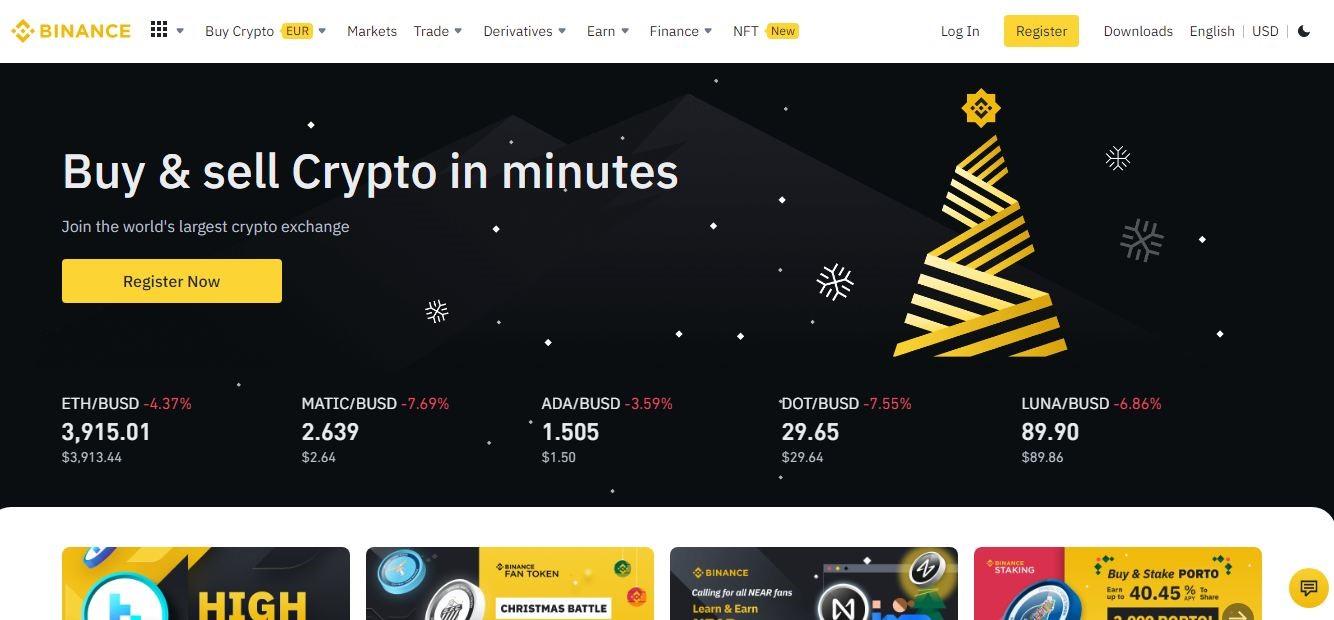
Step 1: Visit the Binance Website
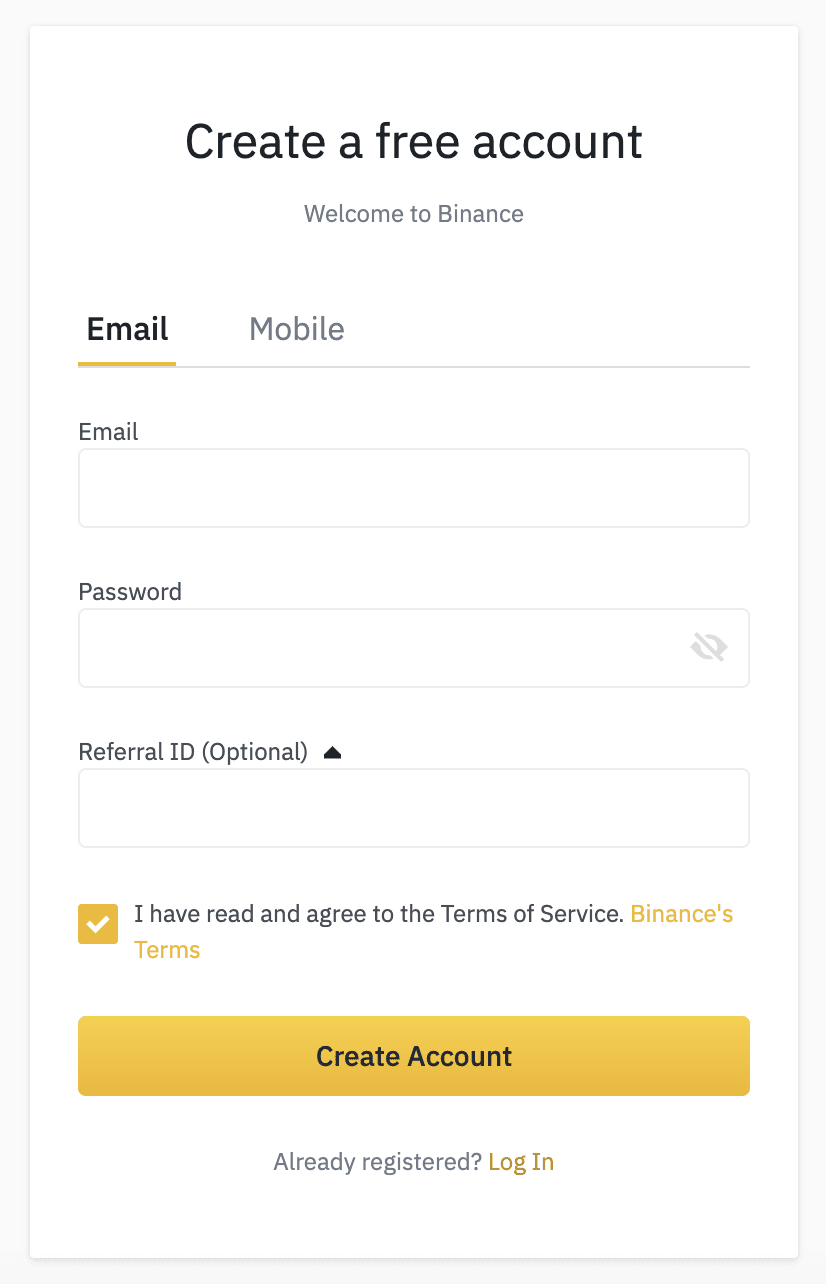
Step 2: Click on the “Register” option in the upper right-hand corner and complete the relevant information. Binance will validate your account details throughout the registration process, which may take a few minutes.
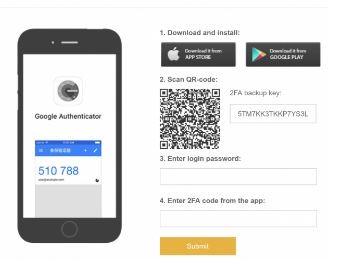
Step 3: Enable 2-Factor Authentication.
Step 4: Select and Link you payment Methods.
Step 5: Deposit and Start trading.
So kaufen Sie IOTA auf Binance
Binance has a rich collection of tools and dashboards that might be overwhelming. Its Buy Crypto page makes it easy to cut through the confusion and conduct straightforward transactions. It has a simple interface where you can buy, sell, or convert cryptocurrency.
1. Login to your Binance account and on the homepage click on the “Buy Crypto “Button.
2. You can purchase IOTA (MIOTA) using a variety of fiat currencies. Enter the amount of fiat money you wish to spend, and the system will calculate the amount of IOTA you can acquire.
3. Select the payment method and fill the required information than Continue.
4. Please double-check the payment information and costs, and complete your purchase within 1 minute, otherwise the amount of IOTA you may get will be adjusted depending on the current market price.
5. You'll be taken to your bank's OTP Transaction Page. To validate the payment, follow the on-screen instructions. Following that, you will be able to see the acquired MIOTA in your Binance Spot Wallet immediately.
3. Binance
Binance is well-known for its cryptocurrency-to-cryptocurrency trading services. Binance came onto the scene during the 2017 crypto craze and has since risen to become the world's leading cryptocurrency exchange.
By trading volume, Binance is the world's largest online cryptocurrency exchange. The exchange is also one of the most rapidly growing venues in the cryptocurrency market today. You can easily buy and sell IOTA (MIOTA) using our step by step guide.
The exchange offers investors one of the most diverse selections of cryptos accessible on the market today. The currencies and tokens on sale range from the markets largest by market cap to some smaller and less well-known coins and tokens.
Binance Vorteile
- Over 365 coins are available for trading on a global scale.
- A diverse range of trading options and order types are available.
- Low transaction costs.
- Payment options are supported in a variety of ways.
Binance Nachteile
- The platform is complicated and may be confusing for some people.
- U.S exchange is more limited than others.
- Binance has ran into regulatory issues in a number of nations.
So kaufen Sie IOTA auf Binance
Binance has a rich collection of tools and dashboards that might be overwhelming. Its Buy Crypto page makes it easy to cut through the confusion and conduct straightforward transactions. It has a simple interface where you can buy, sell, or convert cryptocurrency.
1. Login to your Binance account and on the homepage click on the “Buy Crypto “Button.
2. You can purchase IOTA (MIOTA) using a variety of fiat currencies. Enter the amount of fiat money you wish to spend, and the system will calculate the amount of IOTA you can acquire.
3. Select the payment method and fill the required information than Continue.
4. Please double-check the payment information and costs, and complete your purchase within 1 minute, otherwise the amount of IOTA you may get will be adjusted depending on the current market price.
5. You'll be taken to your bank's OTP Transaction Page. To validate the payment, follow the on-screen instructions. Following that, you will be able to see the acquired MIOTA in your Binance Spot Wallet immediately.
4. Binance
Binance is well-known for its cryptocurrency-to-cryptocurrency trading services. Binance came onto the scene during the 2017 crypto craze and has since risen to become the world's leading cryptocurrency exchange.
By trading volume, Binance is the world's largest online cryptocurrency exchange. The exchange is also one of the most rapidly growing venues in the cryptocurrency market today. You can easily buy and sell IOTA (MIOTA) using our step by step guide.
The exchange offers investors one of the most diverse selections of cryptos accessible on the market today. The currencies and tokens on sale range from the markets largest by market cap to some smaller and less well-known coins and tokens.
Erste Schritte mit Binance
Users must first create an account in order to utilize the exchange. The procedure is quite quick and straightforward, and you do not need to verify your account for level 1, which has a daily withdrawal limit of 2BTC.
For level 2, which enables up to 100BTC every day, you must upload a picture ID and wait for approval. There are still greater restrictions, but you must contact them personally to arrange for them.
Follow the steps below to open a Binance account:
Step 1: Visit the Binance Website
Step 2: Click on the “Register” option in the upper right-hand corner and complete the relevant information. Binance will validate your account details throughout the registration process, which may take a few minutes.
Step 3: Enable 2-Factor Authentication.
Step 4: Select and Link you payment Methods.
Step 5: Deposit and Start trading.
Binance Vorteile
- Over 365 coins are available for trading on a global scale.
- A diverse range of trading options and order types are available.
- Low transaction costs.
- Payment options are supported in a variety of ways.
Binance Nachteile
- The platform is complicated and may be confusing for some people.
- U.S exchange is more limited than others.
- Binance has ran into regulatory issues in a number of nations.
So kaufen Sie IOTA auf Binance
Binance has a rich collection of tools and dashboards that might be overwhelming. Its Buy Crypto page makes it easy to cut through the confusion and conduct straightforward transactions. It has a simple interface where you can buy, sell, or convert cryptocurrency.
1. Login to your Binance account and on the homepage click on the “Buy Crypto “Button.
2. You can purchase IOTA (MIOTA) using a variety of fiat currencies. Enter the amount of fiat money you wish to spend, and the system will calculate the amount of IOTA you can acquire.
3. Select the payment method and fill the required information than Continue.
4. Please double-check the payment information and costs, and complete your purchase within 1 minute, otherwise the amount of IOTA you may get will be adjusted depending on the current market price.
5. You'll be taken to your bank's OTP Transaction Page. To validate the payment, follow the on-screen instructions. Following that, you will be able to see the acquired MIOTA in your Binance Spot Wallet immediately.
Andere Börsen zum Kaufen von IOTA
Neben der Verwendung der oben genannten beliebten Plattformen gibt es eine Vielzahl kleinerer Kryptowährungsbörsen, an denen Sie MIOTA kaufen können.
| 1. Binance | Join Now |
| 2. Binance | Join Now |
| 3. Binance | Join Now |
| 4. Binance | Join Now |
| 5. Binance | Join Now |
| 6. Binance | Join Now |
| 7. Binance | Join Now |
| 8. Binance | Join Now |
| 9. Binance | Join Now |
| 10. Binance | Join Now |
| 11. Binance | Join Now |
Kaufen IOTA auf dezentralisierten Börsen.
Unten finden Sie eine umfassende und detaillierte Übersicht über erstklassige dezentrale Börsen, mit denen Sie IOTA (MIOTA) einfach kaufen können.
kaufen IOTA bei Pancakeswap
Derzeit sind dies zwei beliebte Möglichkeiten, IOTA mit Pancakeswap zu kaufen.
So kaufen Sie IOTA auf Pancakeswap mit MetaMask
In diesem Abschnitt behandeln wir den gesamten Prozess des Kaufs von IOTA (MIOTA) mit Pancakeswap, also lesen Sie den ganzen Artikel.
Warum sollten Sie PancakeSwap verwenden?
PancakeSwap hat in letzter Zeit viel Interesse geweckt, teilweise dank der niedrigen Transaktionskosten der BSC im Vergleich zu Ethereum, der anderen wichtigsten dezentralisierten Blockchain. PancakeSwap ist zusätzlich zu den günstigeren Transaktionskosten auf der BSC effektiv ein Fork von Uniswap, einer der beliebtesten dezentralen Börsen auf der Ethereum-Blockchain, mit neuen Funktionen hinzugefügt.

Pancake Swap ist ein von Binance Smart Chain betriebener dezentraler Kryptowährungsaustausch (DEX) und automatisierter Market Maker (AMM). Binance Coin (BNB) wird für Gebühren verwendet, während PancakeSwap (CAKE) für die Verwaltung verwendet wird.
Darüber hinaus erregte Pancake Swap aufgrund der großen Anzahl von BEP-20-Token, die auf seiner Plattform verfügbar sind, viel Aufmerksamkeit und wird insbesondere für BEP-20-Token verwendet, die auf Binance Smart Chain betrieben werden, während Token von anderen Plattformen gesendet werden können über die Binance Bridge übertragen und als BEP-20-Token zur Verwendung auf dem DEX "verpackt".
Bevor Sie Krypto bei PancakeSwap kaufen, müssen Sie eine mit Pancakeswap kompatible Brieftasche wie Metamask haben. Gehen Sie folgendermaßen vor, um ein Metamask-Konto zu erstellen:
Schritt 1: Metamask-Erweiterung herunterladen
Um Ihr Metamask-Wallet einzurichten, wird empfohlen, dass Sie Google Chrome mit MetaMask verwenden, da der Browser weniger Probleme hat als andere. Um zu überprüfen, ob Sie sich auf der richtigen Plattform befinden, öffnen Sie Ihren Chrome-Browser und geben Sie oben die Webadresse metamask.io ein. Laden Sie nach Eingabe der URL die MetaMask-Erweiterung herunter und installieren Sie sie.

Schritt 2: Erste Schritte mit Metamask
Klicken Sie auf das neu installierte Metamask-Symbol in der oberen rechten Leiste im Chrome-Browser und öffnen Sie es.
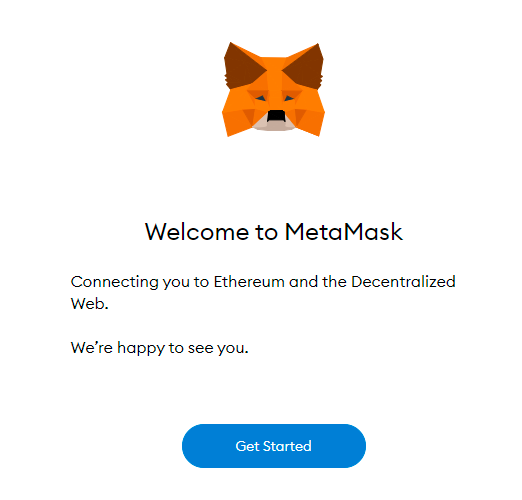
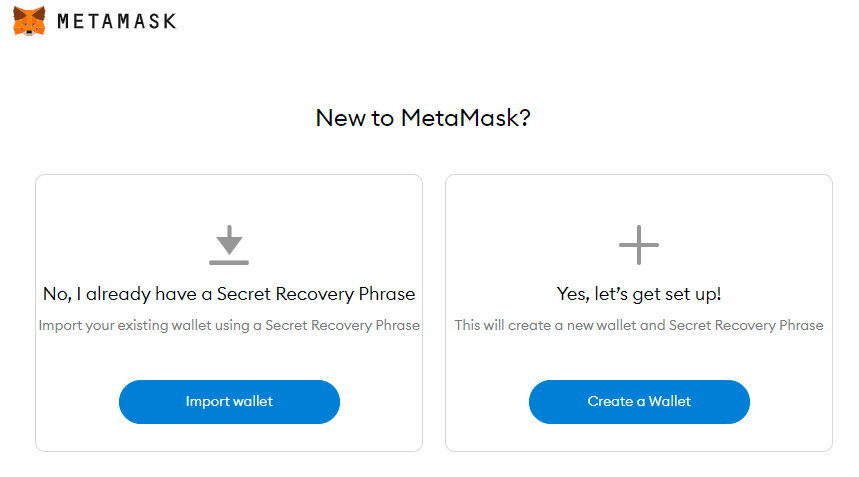
Klicken Sie jetzt auf die Schaltfläche „Erste Schritte“. Sie werden gefragt, ob Sie neu bei MetaMask sind. Hier können Sie Ihre Brieftasche importieren, wenn Sie bereits über eine Seed-Phrase verfügen und Zugriff darauf erhalten möchten. Klicken Sie auf Wallet erstellen, wenn Sie gerade erst anfangen.
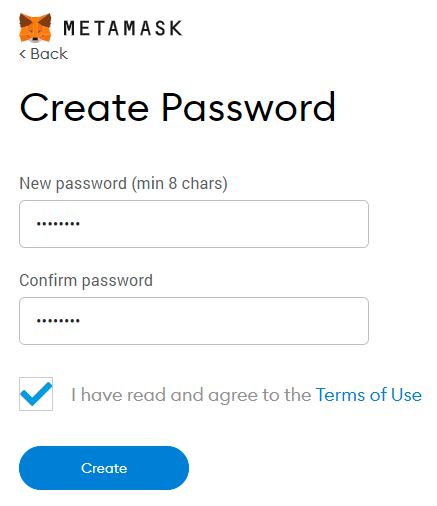
Nachdem Sie auf ‘’Create a Wallet’’ geklickt haben, fordert MetaMask Informationen von Ihnen an, um ihre Plattform zu verbessern.
Erstellen Sie Ihr Passwort, akzeptieren Sie die Nutzungsbedingungen und klicken Sie auf Erstellen. Wenn MetaMask oder eine DApp Sie auffordert, sich bei MetaMask anzumelden, geben Sie dieses Passwort ein.
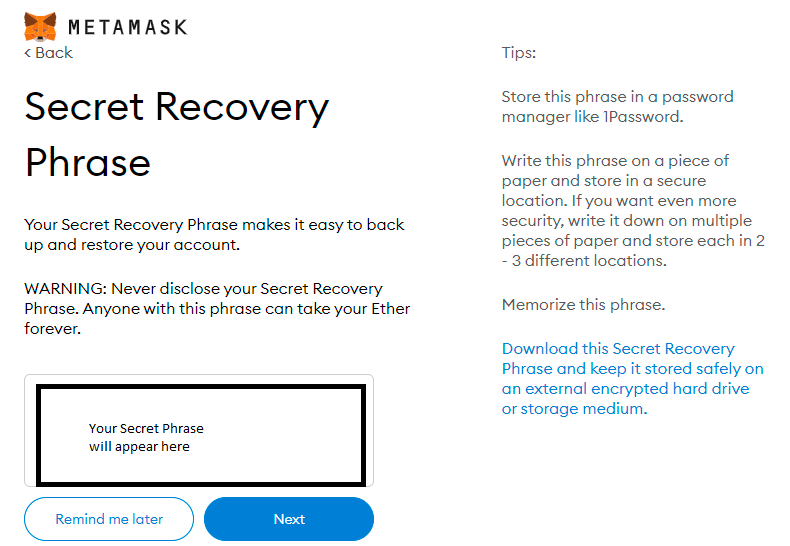
Schritt 3: Erstellen Sie eine Ausgangsphrase mit 12 Wörtern
Erstellen Sie Ihre 12-Wörter-Startphrase, die auch als geheime Backup-Phrase in MetaMask bekannt ist. Wenn Sie MetaMask jemals aus Ihrem Browser löschen, können Sie Ihr Konto auf diese Weise wiederherstellen. Mit einer Startphrase können Sie auch von überall auf einem neuen Computer auf Ihr Konto zugreifen. Auf der folgenden Seite werden Sie aufgefordert, Ihre Geheimphrase in der richtigen Reihenfolge zu bestätigen.
Großartig! Sie haben gerade Ihre MetaMask erstellt.
Wenn Sie Metamask zum ersten Mal verwenden, müssen Sie das Binance Smart Chain (BSC) Network zu Metamask hinzufügen, da Pancakeswap nur auf BSC funktioniert. Der Vorgang ist einfach und unkompliziert.
1. Klicken Sie in Metamask oben rechts auf das Kontosymbol.
2. Gehen Sie zu Einstellung > Werbenetzwerke > Netzwerk hinzufügen
3. Füllen Sie das Formular mit diesen Details aus und klicken Sie auf Speichern.
- Netzwerkname: BSC
- Neue RPC-URL: https://bsc-dataseed.binance.org/
- Ketten-ID: 56
- Symbol: BNB
- Block-Explorer: https://bscscan.com
Nachdem Sie Ihre Brieftasche erstellt und BSC zu den Metamask-Netzwerken hinzugefügt haben, besteht der nächste Schritt darin, Binance Coin (BNB) für den Kauf und die Zahlung der Netzwerk-Gasgebühr darin zu erhalten. Um BNB zu kaufen, kopieren Sie einfach und notieren Sie sich Ihre Metamask-Wallet-Adresse. Kaufen Sie einige Binance-Münzen an unseren empfohlenen Börsen, indem Sie die oben aufgeführten Schritte befolgen (Abschnitt zum Kauf von Binance-Münzen).
Profi-Tipp: Sie können eine Wallet-Adresse mit demselben privaten Schlüssel sowohl im Ethereum- als auch im Binance Smart Chain Network verwenden.
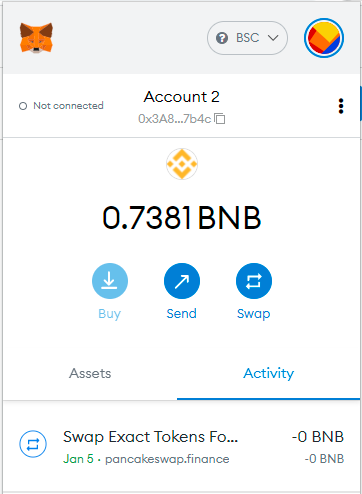
Suchen Sie die Auszahlungsoption in Ihrer ausgewählten Börse. Wählen Sie Binance-Münze als Auszahlungsmünze. Füllen Sie das Formular mit Ihrer Metamask-Adresse und Binance Smart Chain als Netzwerk aus. Nach der Überweisung sehen Sie die BNB-Münze in Ihrer Metamask-Wallet.
Jetzt haben wir alles, um Pancakeswap zu verwenden und MIOTA zu kaufen.
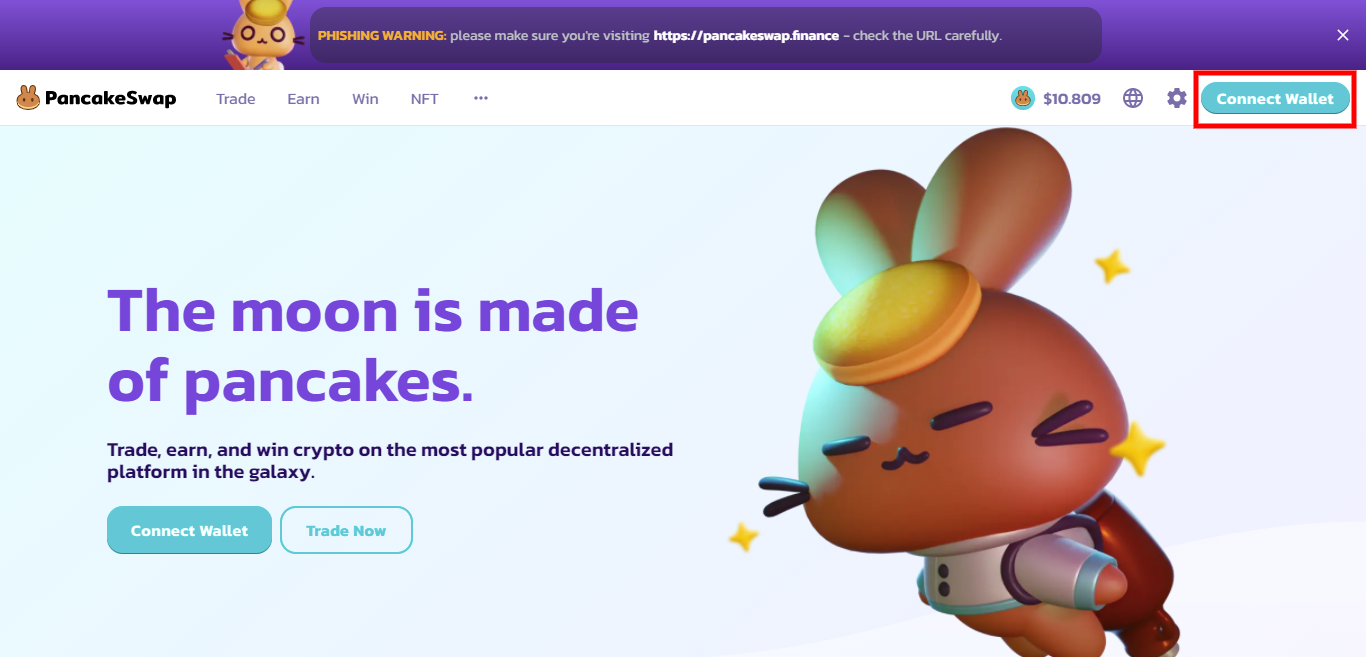
Schritt 4: Pancakeswap starten und Metamask verbinden
Gehen Sie zu Pancakeswap.finance, klicken Sie auf Wallet verbinden und wählen Sie Metamask-Wallet aus. Nachdem Sie Ihr Wallet mit Pancakeswap verbunden haben, können Sie jetzt mit dem Token-Handel auf der offiziellen Website von Pancake beginnen.
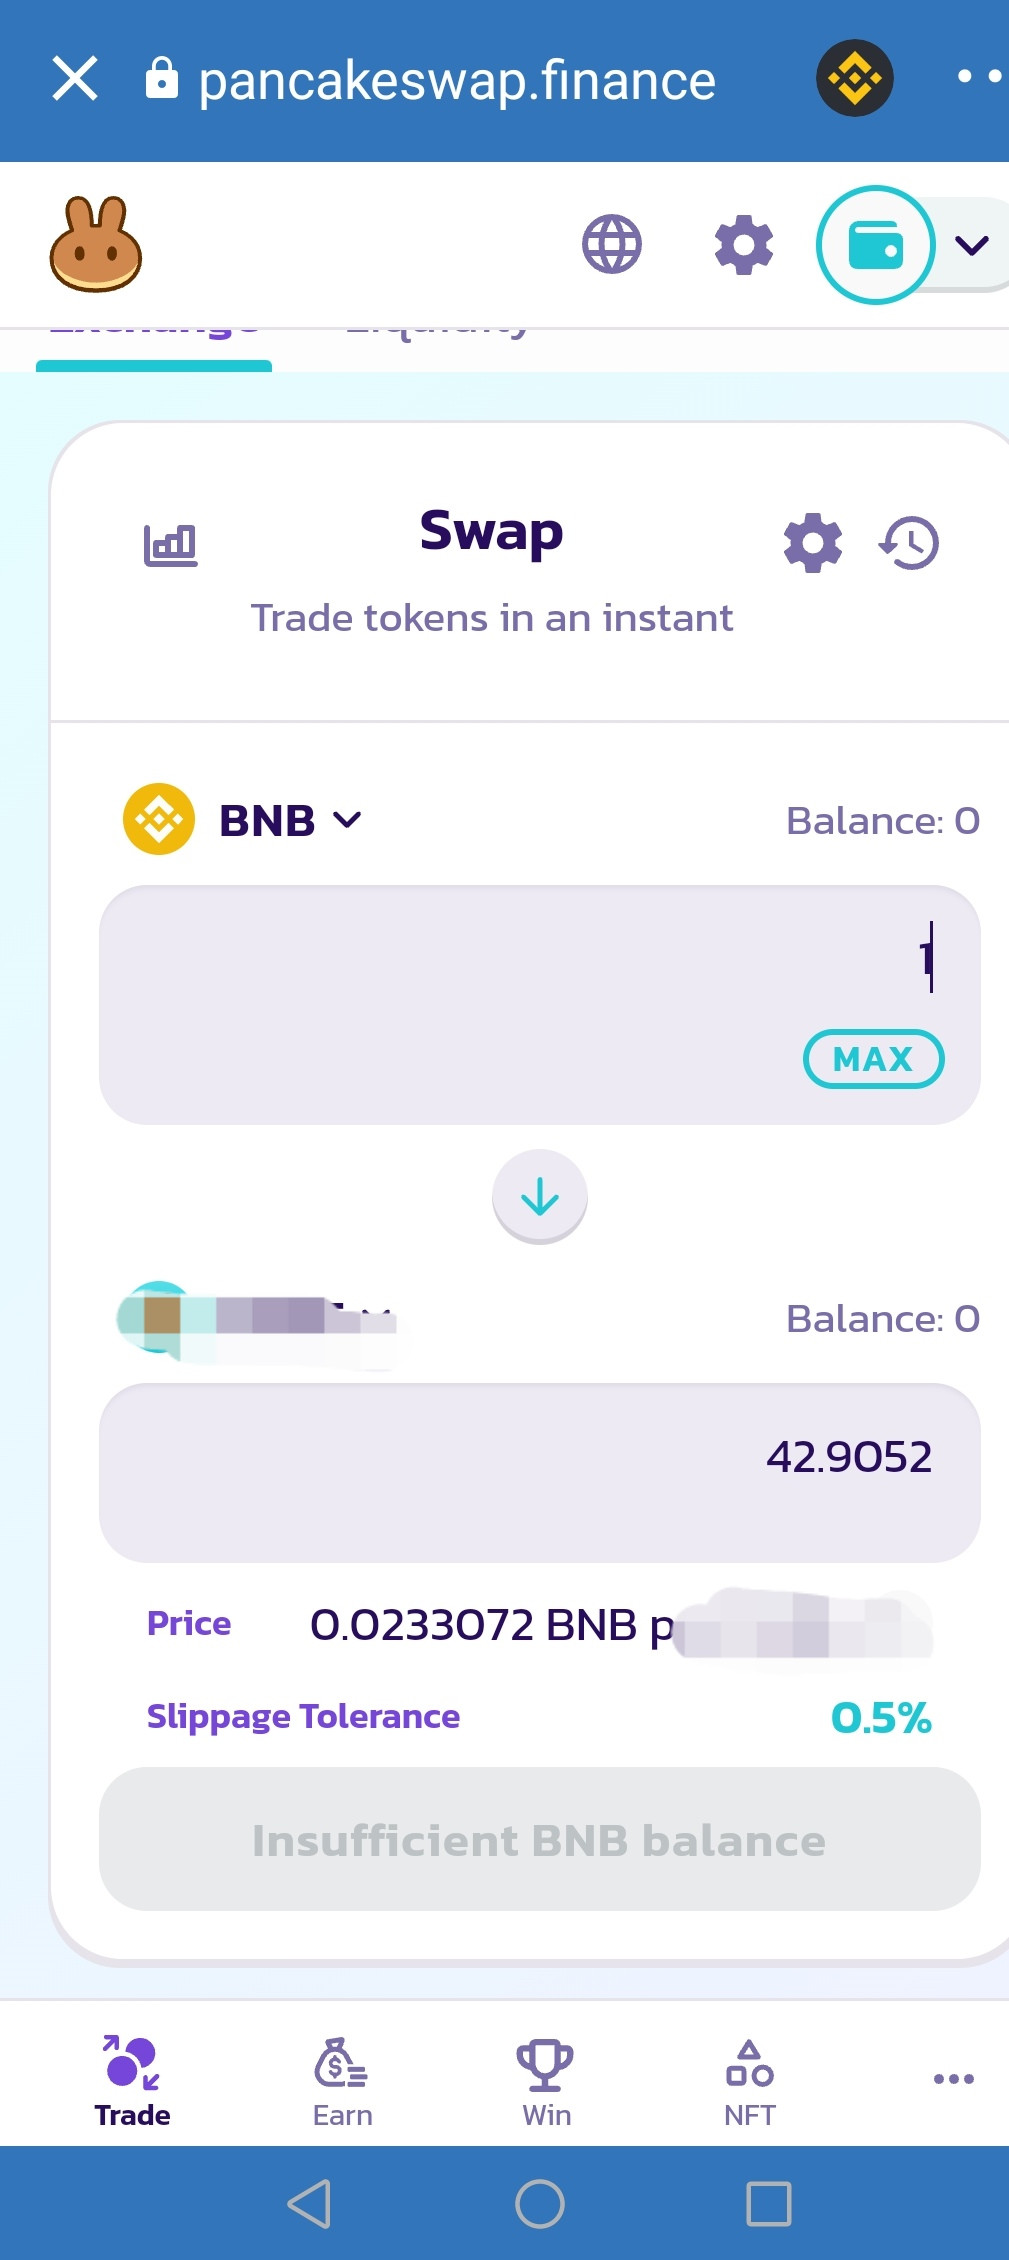
Schritt 5: Tausche BNB gegen MIOTA
Klickhandel > Swap aus dem Hauptmenü. Jetzt müssen Sie den Betrag der Kryptowährung eingeben, den Sie tauschen möchten. Die Menge des anderen Tokens (IOTA), die Sie erhalten, wird automatisch von Pancakeswap berechnet. Auf dem Hauptbildschirm gibt es zwei Kästchen. Die erste Box für BNB und die zweite für die Sie kaufen möchten.
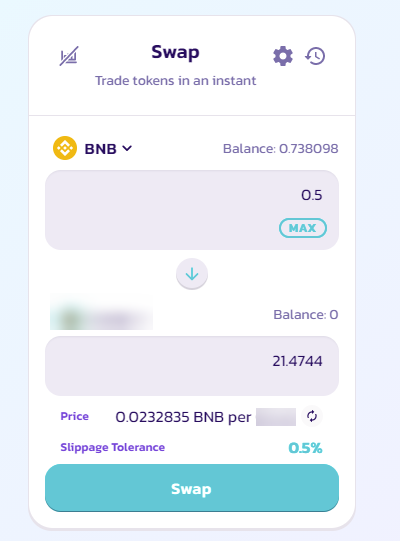
Bevor Sie die Konvertierung abschließen, gehen Sie die Details durch und überprüfen Sie, ob alles in Ordnung ist. Wenn Sie fertig sind, drücken Sie einfach „Tauschen“ und dann „Tauschen bestätigen“. Das ist alles.
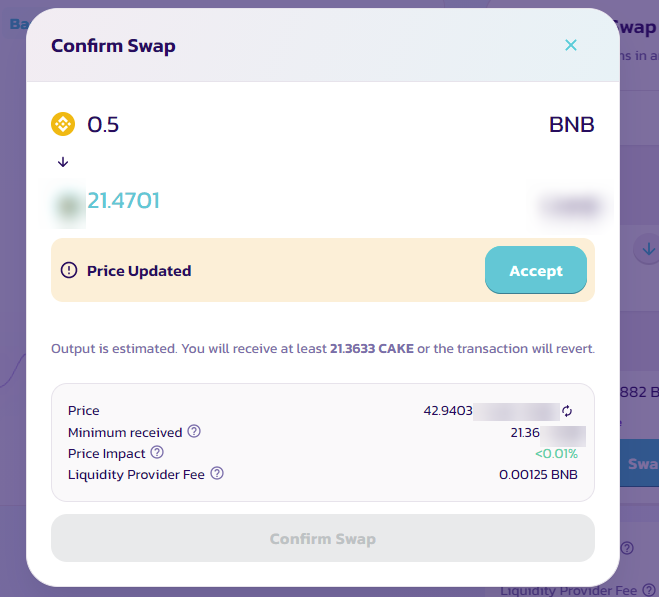
Sobald der Handel verifiziert ist, erscheint MIOTA in Ihrem Wallet.
So kaufen Sie IOTA auf Pancakeswap mit Trust Wallet
In diesem Abschnitt erfahren Sie, wie Sie Trust Wallet verwenden, um IOTA (MIOTA) mit Pancakeswap zu erwerben. PancakeSwap ist ein von Binance Smart Chain betriebener DEX (dezentraler Austausch). Die Benutzer von Pancakeswap können BEP-20-Token schnell und sicher austauschen.
Warum sollten Sie PancakeSwap verwenden?
PancakeSwap hat in letzter Zeit viel Interesse geweckt, teilweise dank der niedrigen Transaktionskosten der BSC im Vergleich zu Ethereum, der anderen wichtigsten dezentralisierten Blockchain. PancakeSwap ist zusätzlich zu den günstigeren Transaktionskosten auf der BSC effektiv ein Fork von Uniswap, einer der beliebtesten dezentralen Börsen auf der Ethereum-Blockchain, mit neuen Funktionen hinzugefügt.
Pancake Swap ist ein von Binance Smart Chain betriebener dezentraler Kryptowährungsaustausch (DEX) und automatisierter Market Maker (AMM). Binance Coin (BNB) wird für Gebühren verwendet, während PancakeSwap (CAKE) für die Verwaltung verwendet wird.
Darüber hinaus erregte Pancake Swap aufgrund der großen Anzahl von BEP-20-Token, die auf seiner Plattform verfügbar sind, viel Aufmerksamkeit und wird insbesondere für BEP-20-Token verwendet, die auf Binance Smart Chain betrieben werden, während Token von anderen Plattformen gesendet werden können über die Binance Bridge übertragen und als BEP-20-Token zur Verwendung auf dem DEX "verpackt".
Bevor Sie Krypto auf PancakeSwap kaufen, müssen Sie eine mit Pancakeswap kompatible Geldbörse wie Trust Wallet haben. Führen Sie die folgenden Schritte aus, um ein Trust Wallet-Konto zu erstellen:
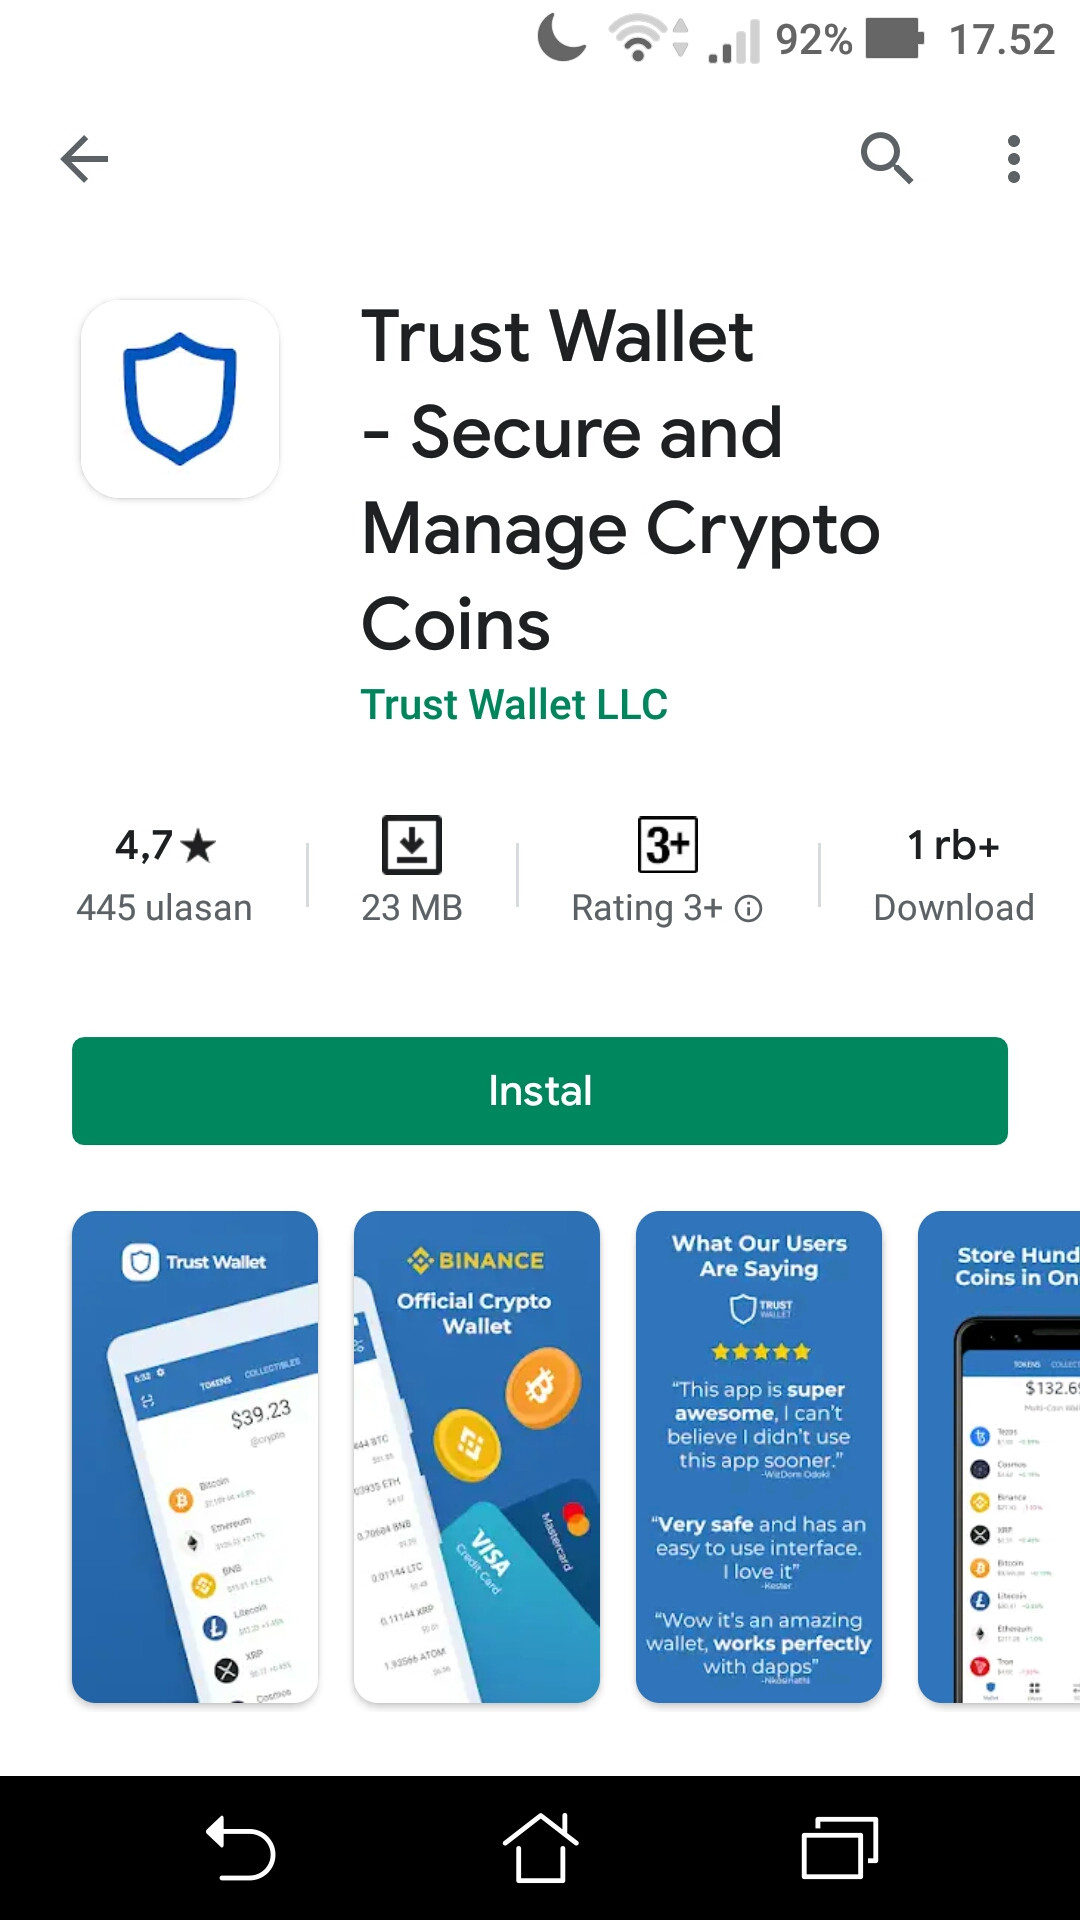
Schritt 1: Trust Wallet herunterladen
Bevor Sie beginnen, müssen Sie zuerst die Trust-Wallet-App von Google Play oder dem App Store herunterladen. Zum Zeitpunkt der Erstellung dieses Handbuchs ist Trust Wallet nur für Android- und IOS-Benutzer verfügbar.
 < /p>
< /p>
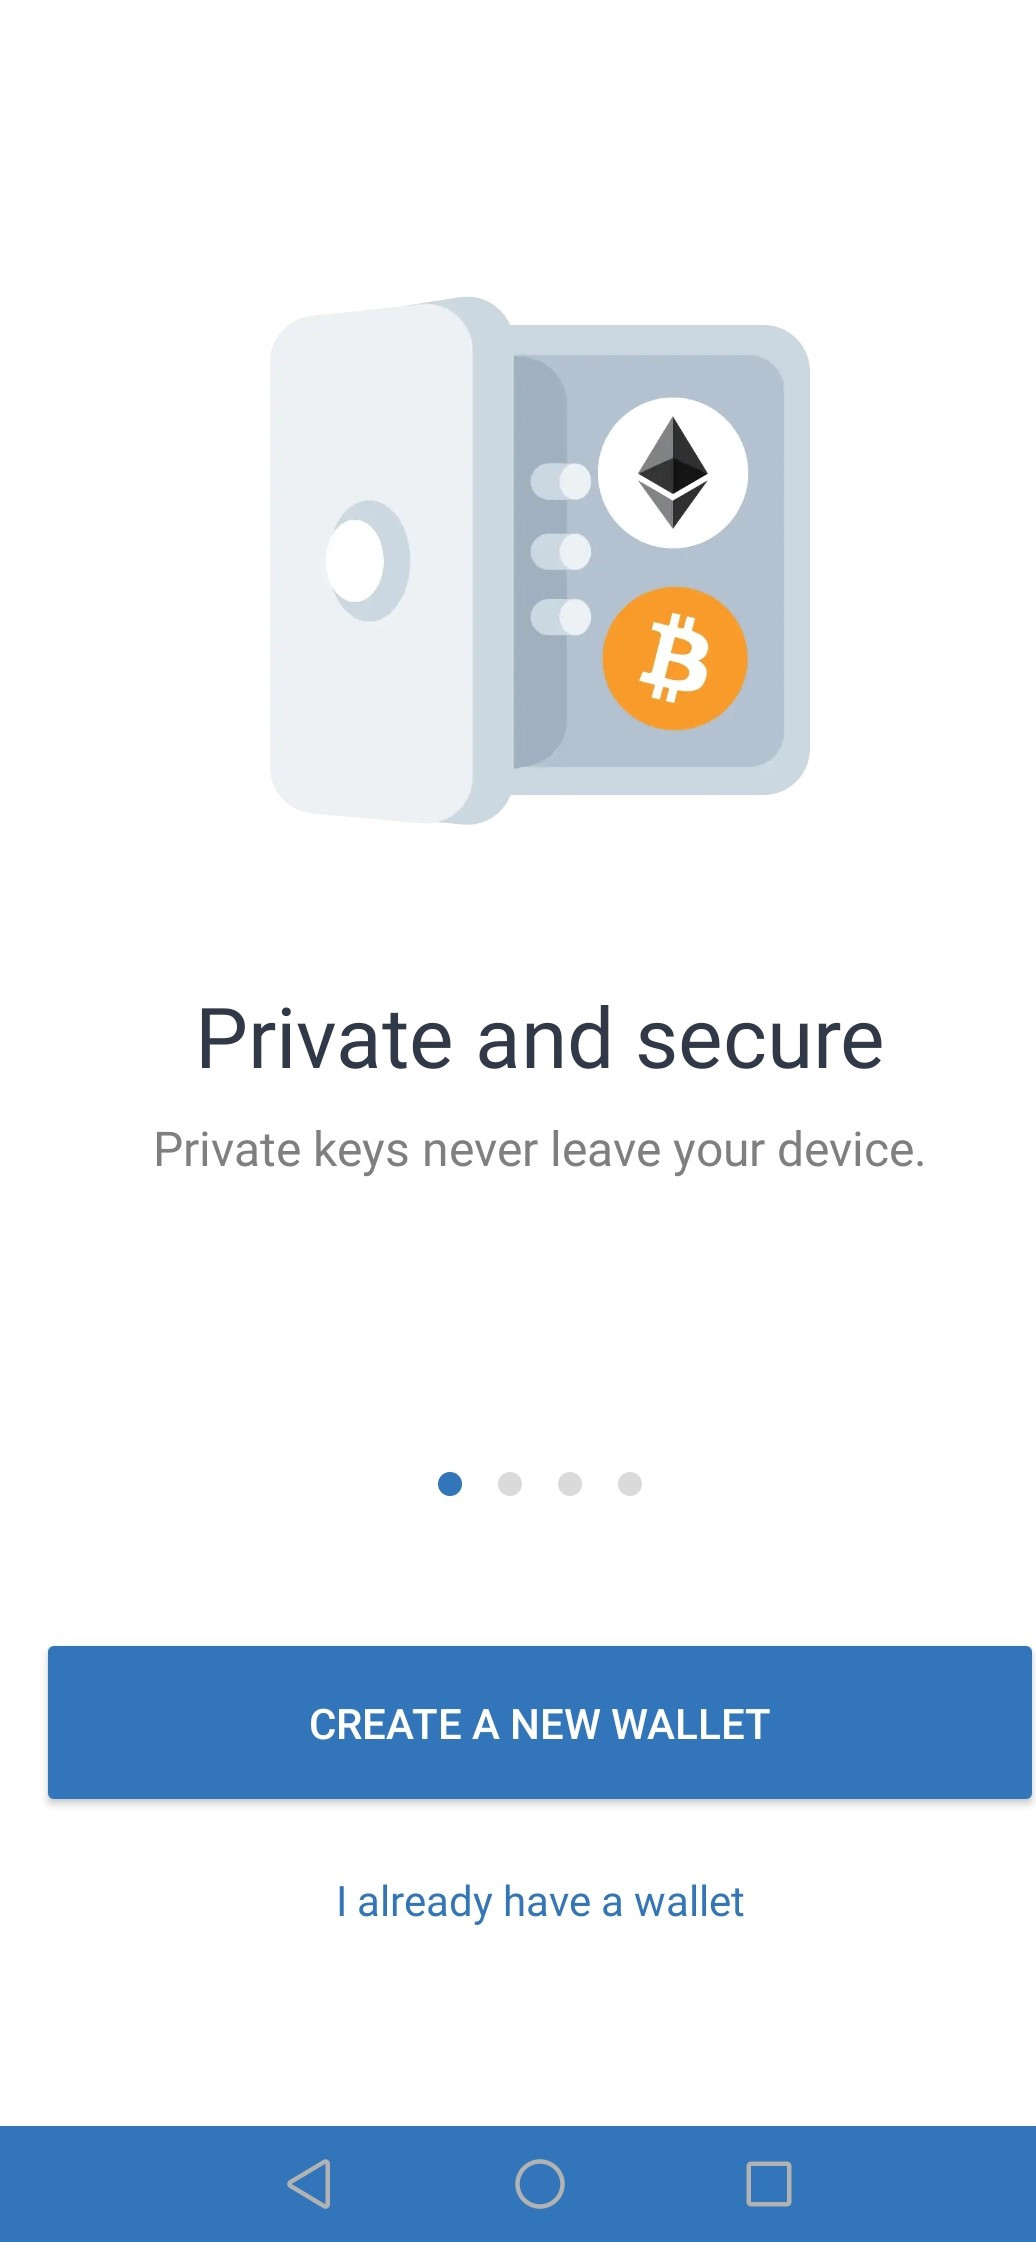
Schritt 2: Erste Schritte mit Trust Wallet
Klicken Sie nach der Installation auf „Neues Wallet erstellen“. Lesen Sie die Datenschutzerklärung und die Nutzungsbedingungen, aktivieren Sie dann das Kontrollkästchen zur Bestätigung und klicken Sie auf „Fortfahren.“
 < /p>
< /p>
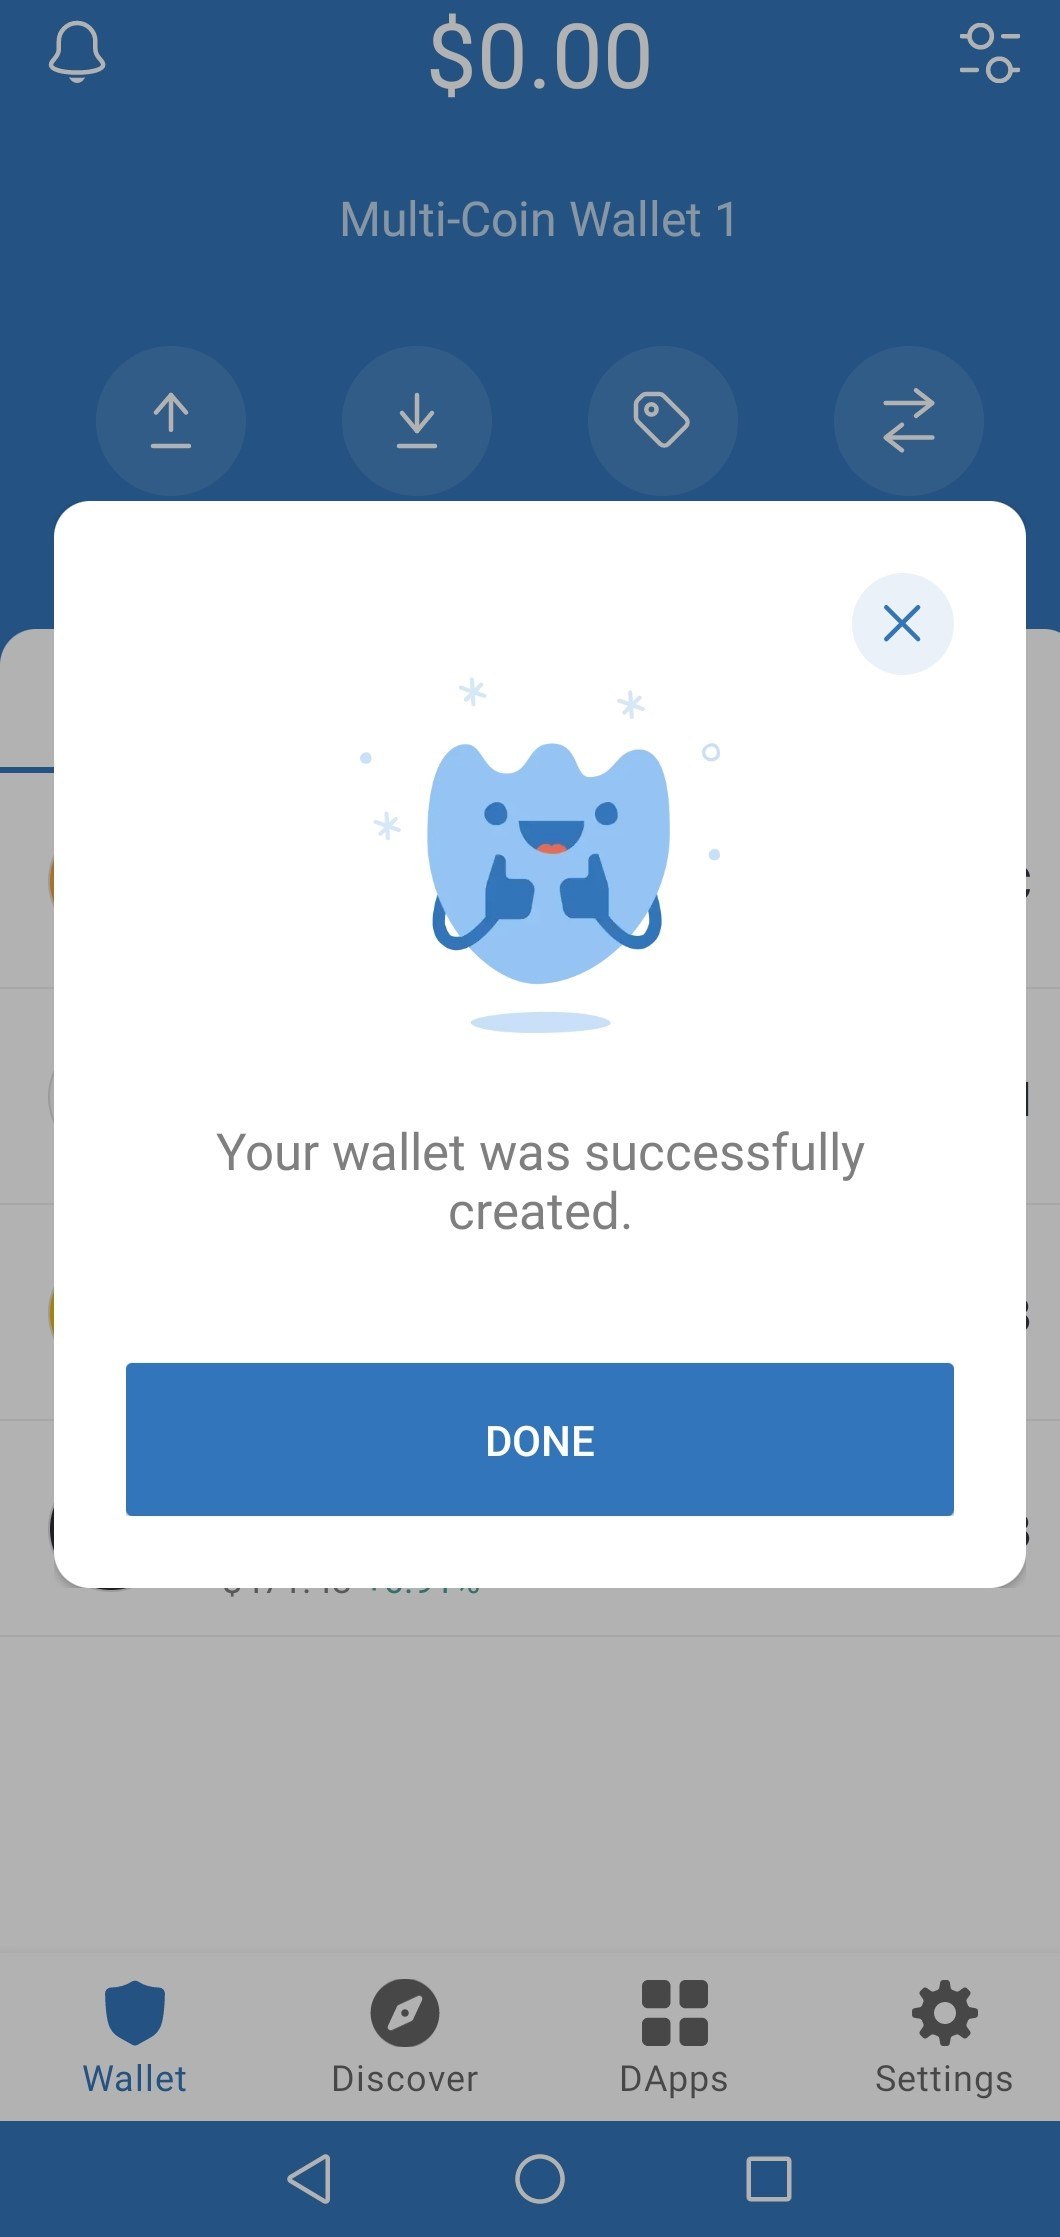
Schritt 3: Erstellen Sie eine Ausgangsphrase mit 12 Wörtern
Notieren Sie Ihren aus 12 Wörtern bestehenden Wiederherstellungssatz auf einem Blatt Papier und bewahren Sie ihn an einem sicheren Ort auf, an dem Sie ihn nicht vergessen. Wenn Sie Ihren Satz eingegeben haben, drücken Sie die Wörter auf dem nächsten Bildschirm, um sie in die richtige Reihenfolge zu bringen und sicherzustellen, dass Sie es richtig gemacht haben.
 < /p>
< /p>
Großartig! Sie haben gerade Ihr Trust Wallet-Konto erstellt.
Nachdem Sie Ihre Brieftasche erstellt haben, besteht der nächste Schritt darin, Binance Coin (BNB) zum Kaufen und Bezahlen der Netzwerk-Gasgebühr darin zu erhalten. Um BNB zu kaufen, kopieren Sie einfach und notieren Sie sich Ihre Trust-Wallet-Adresse. Kaufen Sie einige Binance-Münzen an unseren empfohlenen Börsen, indem Sie die oben aufgeführten Schritte befolgen (Abschnitt zum Kauf von Binance-Münzen).
Suchen Sie die Auszahlungsoption in Ihrer ausgewählten Börse. Wählen Sie Binance-Münze als Auszahlungsmünze. Füllen Sie das Formular mit Ihrer Trust-Wallet-Adresse und Binance Smart Chain als Netzwerk aus. Nach der Überweisung sehen Sie die BNB-Münze in Ihrer Trust-Wallet.
Jetzt haben wir alles, um Pancakeswap zu verwenden und IOTA zu kaufen.
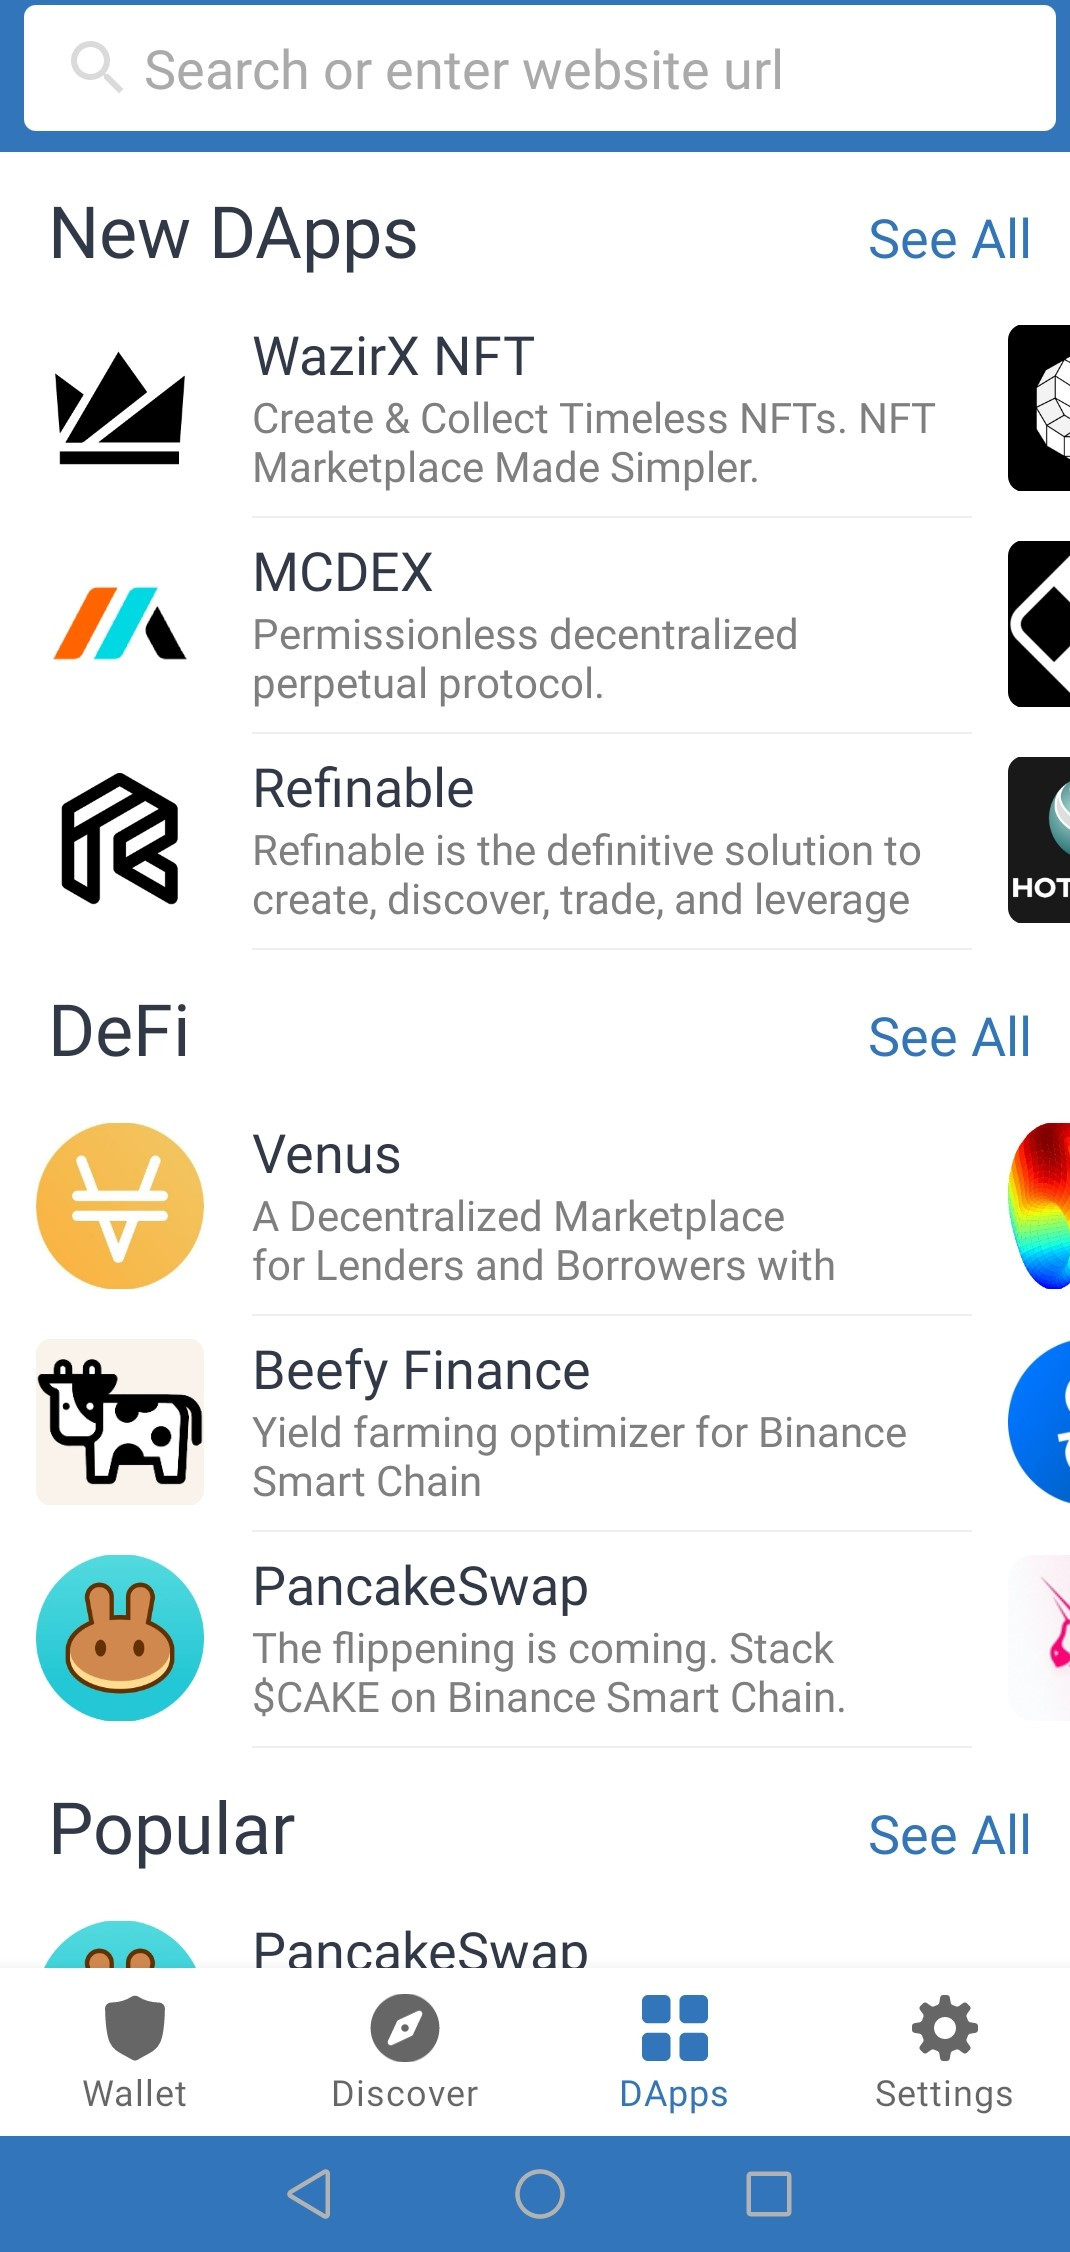
Schritt 4: Pancakeswap starten und Wallet vertrauen
verbinden
Öffnen Sie Ihre Trust-Wallet-App und navigieren Sie im unteren Menü zur Dapps-Option. Suchen Sie jetzt nach Pancakeswap oder geben Sie in das Suchfeld ein und drücken Sie die Eingabetaste.
 < /p>
< /p>
Gehen Sie zu Pancakeswap.finance, klicken Sie auf Wallet verbinden und wählen Sie Wallet vertrauen aus. Nachdem Sie Ihr Wallet mit Pancakeswap verbunden haben, können Sie jetzt mit dem Token-Handel auf der offiziellen Website von Pancake beginnen.
 < /p>
< /p>
Schritt 5: BNB gegen IOTA tauschen
Entscheiden Sie zuerst, welche Kryptowährung Sie umtauschen möchten. Token können anhand des Namens oder der Adresse von CoinMarketCap gefunden werden. In unserem Fall möchten wir IOTA (MIOTA) über Pancakeswap kaufen, also wählen wir MIOTA.
Wir möchten BNB gegen IOTA tauschen. Wenn Sie eine bestimmte Menge BNB handeln möchten, geben Sie diese Menge in den BNB-Bereich ein. Wenn Sie möchten, können Sie eine bestimmte Menge an IOTA in den Bereich IOTA-Betrag einzahlen.
 < /p>
< /p>
Der Bildschirm zeigt Ihnen die bestmöglichen Kurse, zu denen Ihre Münze getauscht wird. Wenn Sie mit dem Kurs und Betrag einverstanden sind, klicken Sie auf Tauschen, und Sie werden zu einem neuen Fenster weitergeleitet, in dem Sie die Einzelheiten Ihres Swaps überprüfen können.
Um fortzufahren und die Übertragung abzuschließen, notieren Sie sich die Gebühr als Netzwerkgebühr und klicken Sie auf Tauschen. Sobald der Handel verifiziert ist, erscheint IOTA in Ihrem Wallet.
Schlussfolgerung
Die Auswahl der besten Kryptowährungsplattform für IOTA (MIOTA) kann eine schwierige Aufgabe sein, es gibt verschiedene Faktoren, die man berücksichtigen sollte, bevor man sich für eine Kryptobörse entscheidet. Dazu gehören die Gebührenstruktur, Sicherheit, Börsenfunktionen und ob sie auf Fiat oder Krypto basieren.
Denken Sie daran, sobald Sie einige Börsen in die engere Wahl gezogen haben, recherchieren Sie über jede von ihnen, um die für Sie am besten geeignete zu finden